Showing posts with label WIP. Show all posts

Wednesday, February 13, 2013

WIP Update

Well I FINALLY finished the seed stitch in the red puzzle piece! I really don't have any idea what came over me to want to do seed stitch in that large of an area. Anyway--it's done now! 

For the yellow piece, I decided to go with the detached fly stitch. It went very quickly! I'm pleased with how it came out. (please disregard the blue pen behind the yellow outline--it will wash out once I've finished everything)


 I'm not sure yet what stitch I'll use to fill the green piece. If any of you have any ideas, please feel free to pass them along in the comments section!

Thanks for stopping by!

Update!! I looked at the blank green piece for a bit and it came to me--diagonal running stitch! I'm only about 95% please with how it came out (my stitches are not uniform), but that 5% displeasure wasn't enough to make me pull the whole thing out *grin* Though I did pull a few stitches out here and there that were just absolutely wonky...
Nothing left but the back-stitching!


WIP--Autism Awareness

So I have this friend, Heather--the one I did the owl for (another preposition ending a sentence...I know...I can't believe I'm doing it again). We she has this friend who has a blog about her cookies (and other things). You can see it over at The Cookie Puzzle. Anyway, this friend of a friend is doing guest blog spots on her blog in April for Autism Awareness Month, and she asked if I would be interested in doing something crafty having to do with Autism Awareness. 

Well despite my line of work, I don't deal much or know much about Autism other than what I learned in graduate school 10+ years ago. So I decided I'd do it--do something crafty with an Autism Awareness theme, and hopefully learn a little more in the process.

So I decided I'd do an embroidery piece.  Here is a little look at what I've gotten done so far...


(Just an FYI--the seed stitch filling I'm using in the red puzzle piece is a PAIN IN THE REAR!! It takes FOR. EVER!)

And just a little aside here--I just saw that my little blog has had 1000 views!!  This is exciting as I don't post very much, and I only advertise my blog on FaceBook! My one year blogiversary is in a few days as well *grin*  Yay me!

Thanks for stopping by!

Thursday, January 3, 2013

Hedgehog WIP

So--I've had two sales in my Etsy shop since I listed the owl pattern!

I've been working on another pattern in the same Calavera style. But this time, it's a hedgehog. My little hedgehog is a chubby one. So chubby, in fact, that only his front legs are visible. He's quite the little pudge. *grin*

I'm working it up now so that I can photograph it to post on Etsy. Here's a picture of my progress thus far...


(Sorry for the poor quality of the picture--my camera died and I had to take the pic with my iPhone)

Stop by my Etsy shop if you haven't already, and help pass the word! You can get there from right here!

Thanks for stopping by!

Saturday, June 9, 2012

Be gone, ya!

Actually, it's Begonia--as in the color of paint from Sherman Williams. And boy, is it bright!! My sister picked it out for my craft room, saying it (the craft room) needed to be bright and cheery. Cheery it will be! Take a peek...
The lower part will be Tiki Hut (a really pretty brown) with a chair rail separating the two...for now--it's blinding coming down the hallway!

My brother-in-law Nan also basically finished the 2nd bath today. He installed a glass block window one block at a time--there were no pre-fab ones that fit my window. He also installed the tub surround. I'm actually kind of jealous of this bath compared to my master bath!
Fancy Schmancy huh?? *grin* Nan did a GREAT job!!  Just some minor stuff to finish it up, then I can get to painting in there.

Speaking of bathrooms and painting, I have the top half of my bathroom completed. Just need to put the bottom half on Monday, and it will be ready for flooring! (and ready to put the toilet back in!!) If you can't tell from the picture below, the top half is a light grey, and the bottom half will be one shade darker and separated by a chair rail. My Aunt Ramona painted the window casing and sill today and the linen cabinet. She got started on the medicine cabinet and will finish it next week sometime. She also finished all the trim in my master!
 If you look closely, you can see the line of demarcation  next to the bottom of the linen cabinet.


And yes, that is the toilet sitting in the middle of my bedroom. Hopefully by Wednesday I will have indoor plumbing again! For the time being, we are making trips to my apartment and/or McDonalds for potty breaks!

As for my apartment, I have a living room full of boxes...so I guess I'd better spend some time after church tomorrow packing! I have not packed the first thing yet...anybody wanna come do that for me??? *grin* Just had to ask...

...then choose for yourselves this day whom you will serve...
but as for me and my house, we will serve the Lord.
Joshua 24:15


Friday, March 23, 2012

Polka Dot WIP update

Hi there! It's been a few...I've been feeling non-bloggy lately. Mostly due to my back being wonky since last Monday. I also have not done much in the way of playing with sticks and strings, pins and needles, or anything else crafty. 

However, I did manage to make three more polka dot squares. This puts the total up to lucky number thirteen!! Ha! I've got a loooooooooooooong way to go before I have an afghan!!


Oh--I just realized that I lied when I said I hadn't done much of anything crafty lately. I did attempt to make a new tutorial for a camera "case." However--it didn't turn out quite like I had pictured in my mind. So...there will be no tutorial for now!  It was quite the humorous experience.

I also got all the stitches pulled from my koi fin. I think (for now anyway) that I'll just leave the fins and tail as they are. That may change a million times between now and when I get the quilt finished...

Thanks for stopping by. Hope you have a great weekend!

Thursday, March 15, 2012

I'm Stuck!! *pout*

Arrrrggggghhhhh!!!!  *pulling hair out*  I'm stuck!!  I've been out of commission for a few days because of inflammation in my back and the associated pain and total stiffness that comes along with said inflammation.

But tonight I finally picked up my quilt top again and started working on the koi's fins. I had what I thought was a wonderful idea. It hasn't turned out so wonderful outside of my brain. So now I have to rip out this embroidery, leaving what seems like GIANT holes in my fabric!! (maybe they won't be GIANT and maybe they'll fall out with some steam).

But for now, I'm completely discouraged :(

So it's back to the drawing board. I have some other ideas (well--one other idea)--maybe that will work better than this one did. I don't have a picture to show you, but let's just say that it looks like my fish has worms. Haha!!  Oh, well...

Ok. I'm finished complaining :)

I hope that your day has gone SO MUCH better than mine!

I'd love for you to check out my parents' website. They are directors of a boys' boarding and vocational school in Belmopan Belize.


The school is Global Outreach Belize Vo-Tech and I hope you'll stop by and look at what all the boys do there. They live at the school for three years, attend "regular" classes (i.e. math, Belizean studies, reading, etc) and learn a trade so that they can be productive members of Belize society. They also learn about God and how to be Christian men.

I'm lucky that I get to go visit my parents once a year (except for 2011). I can't wait to go back this year!! 

Thanks for stopping by!

Monday, March 12, 2012

I'm a Wreath Girl! (aka Spring Wreath Tutorial)

Today I'm sharing my first tutorial! 

I decided the other day that I needed a new wreath for my front door--I still had the red berry wreath up from Christmas, and although it is holiday neutral, I decided it was time for a change.

So this is what I came up with...a cheery, happy Spring Wreath!


Here is the list of materials you'll need to make this wreath:
  • One wreath form--I chose a straw form at Hobby Lobby because it was cheaper, but you can use a foam form if you prefer
  • Felt sheets in the colors of your choice--quantity will vary based on the size wreath form you use--my wreath is 14" diameter and I used 12 felt sheets total
  • Hot glue gun and glue sticks
  • Complementary shade of grosgrain ribbon for the hanger--I used 1/2 yard
  • Three complementary shades of worsted weight yarn for the roses
  • Size G crochet hook
  • Yarn needle
  • 6 extra long straight pins (optional)
  • Pinking shears or other decorative edge scissors
Take your felt sheets and cut them in strips about 3 inches wide and long enough to wrap around the wreath form. Using the hot glue gun, shoot a strip of hot glue across one end of the strip and, pulling the other end tight, overlap and secure it in place.


You can choose any pattern you'd like--I used purple, pink, green, pink, green then started over.


Once you get it all covered, it'll look like this:


You can see at the bottom of this picture, the last purple strip is completely on top of the other strips. This is where I chose to place my crocheted flowers.

The tutorial I followed for the crochet roses was from the pompom Emporium and is very easy. However, you can use any flower pattern you like.
Note: If you use the pompom Emporium's pattern, leave a long tail on the beginning and end of your crochet--longer than the 10" she instructs. That way, you have plenty of yarn with which to tie your rose to your wreath.


I made three roses, but you can use however many flowers you want--it's all up to you how flowery your wreath will be! (I like things in threes and other odd numbers)

Once you've completed each rose, use the long tails you left on each end to tie them to the wreath form. Once you've knotted the ends, cut off any excess yarn. (sorry I didn't take a picture of this step!)

To make the hanger, lap the ends of your ribbon over each other (once again, I neglected to take a picture of this step) and sew across the width of the ribbon--either by hand or machine. Then, using your hot glue again, attach the hanger to the back of your wreath. I used six extra long straight pins to reinforce the hanger--you just pin them right through your big blob of hot glue.


Once the hot glue on the hanger has sufficiently cooled (about 5 minutes does the trick) you're ready to hang up your Spring Wreath!

Voila!!

Easy peasy, right?? 

I hope you enjoyed my first tutorial. Hopefully there will be other ones in the future, and hopefully I'll remember to take a photo of each and every step!

(Update as of 3-16-12--> now seen on That's the Ticket Blog Hop!! Check it out! 3-18-12 check out Rusty and Redone KISS party too!)

WIP update

So I finally finished the embroidery on the fish! Well--on the body of the fish anyway. 


It took an entire skein of embroidery floss. So I'm off to the store today to buy another so I can complete the fins and tail. After that, all that will be left to embroider are the other two lily pads!

I'd love to hear from you, especially if you decide to make your own Spring Wreath--let me know how it turns out!

Wednesday, March 7, 2012

It's Hump Day!

Well--I did take a little break...I didn't work on anything Monday night :)  But then I just couldn't help myself and had to go back to it on Tuesday. (Monday night was devoted to watching The Walking Dead and Alcatraz) hehe :)

I worked on my polka dot squares a little and worked a little more on the embroidery on my quilt. I continued work on the "scales" of the koi...that's what it is, by the way, a koi pond. I don't think I've been that specific about it before! So here's a peek at the scales...

he has eyes too! :) 
I'm pleased with how the scales are coming along, but it's slow work. I'm using regular embroidery floss (DMC cotton, size 25) for the scales (two strands) and it's much easier on the fingers--smaller needle and not as much brute force required to get through the fabric. The eyes are also regular floss. The white stripe (I'm not sure of what that is actually called on a real koi) is DMC Pearl cotton, size 5 (as are the veins on the lily pad).

I'm not sure how I'll work the fins and tail yet. I'm thinking I'm going to have to look at many more pictures of real koi to see what might look the best. 

I can't wait to see what it looks like when I get all the embroidery finished! I have an idea of what I'll do for the backing, but I still have no idea about the binding. So if any quilters out there are reading this and have any ideas about a good binding--PLEASE leave a comment with your suggestion! I'd really appreciate it. I know I haven't posted a picture of the whole thing yet, but the blue is the entire background, and the only other colors are the orange of the koi and the green of the lily pad.

Even if you're not a quilter, I'd still love some comments and feedback! Let me hear from you!

She selects wool and flax 
and works with eager hands.
Proverbs 31:13 

Monday, March 5, 2012

Thunder, lightning, and lots of rain!

The Weekend
Well, my luck did in fact NOT hold out--there was much rain on Friday and through the night, so no soccer on Saturday. But, that was alright because I took my beautiful nieces, E and R, to see The Lorax. They were quite excited :)

R (5 yrs old) on the left, and E (7 yrs old--and a snaggle-tooth) on the right
I also used the weekend to continue working on my quilt. I completed all appliques and began the process of embroidering the details. So my fingers are now quite sore--both from the hand applique and the embroidery. I'm far from finished with the embroidery, so I think I'll take a few days' break and allow my fingers to recuperate!

Here's a peek at the embroidery...one lily pad, all done!


 A little bit of life

Were my Mamaw (my great-grandmother) still alive--she went home to be with Jesus in 2008 at the ripe old age of 93 and a half years--you could visit her little house and hear lots of interesting stories about all kinds of people from back in the day. You could also see the rocking chair in which she did most, if not all, of her crocheting and hand sewing. And if you turned that chair to look at the right-hand side, you'd see a veritable cornucopia of pins and needles. She would work on something, usually crocheting around the edges of wash cloths or hemming a pair of pants she'd bought, and then stick the pins and needles in the side of the chair. I can't remember a time when this wasn't the case.

I tell you all of that to show you this...
my "pin cushion"
Yes--there is no doubt about it--I am my Mamaw! :)  At least when it comes to sticking my pins in the furniture. Granted, my pins and needles do eventually make it back to their proper resting place, but I still had to laugh at myself when I realized what gets passed down from generation to generation. 

I think Mamaw would be pleased to know that I'm still quilting (from time to time) and crocheting, since she is the one who taught me both.

Some new goodies!

I got two new goodies to help me with my craftiness! And BOTH were 40% off!!! I LOVE getting things on sale, don't you?!?

While trying to iron the 3/16" seam allowance on my first lily pad the other night, I just about burned my hand off. All I had at that time was my regular Rowenta iron--a big hunk of a thing that is not very conducive to ironing 3/16" seam allowances! Then I ran across this wonderful little thing on someone's quilting blog--a mini iron. Now, I don't know what this says about me, but I had no idea that such a thing existed! I had to have one!

So after work Friday, I braved the rain (well, the sprinkling at that time) and went to Hobby Lobby and found this lovely little Clover Mini Iron! And since I had a 40% off coupon, I left Hobby Lobby very happy! :)

clover mini iron

I then went over to Michael's, for which I also had a 40% off coupon, to look for a craft light. Imagine my delight when I found that ALL of the OttLites were already marked down by 40%!! (I have a lot of !! in this post...) So now I can iron teeny tiny seam allowances and actually SEE what I'm doing while stabbing myself in the fingers with sharp little needles. *grin*

new OttLite!! (just ignore the messy side table)
Last, but not least...

I would like to say HAPPY BIRTHDAY!!!!!!!!!! to my Daddy. Today is his birthday, but I won't tell how old he is--just in case he's sensitive about that kind of stuff :)

For I know the plans I have for you,” declares the LORD, 
“plans to prosper you and not to harm you, 
plans to give you hope and a future.
Jeremiah 29:11 


Wednesday, February 29, 2012

Another Sneak Peek, a WIP, and Some Other Stuff

Another Sneak Peek!

Hi Folks!!  Happy Leap Day! 

I've been working more on my quilt--appliqued another item onto the background. So here's the sneak peek...

it's a lily pad! the detail isn't that great in this pic...
WIP
Now let me share how much of a procrastinator, lazy bum, insert other descriptive words here, that I am. I have, for the past 2 years, been working on a knit afghan. It's a patchwork pattern that I got from LionBrand, and it has three different stitches--garter, moss, and seed (that's my favorite). Why it is taking me so long I have no idea except that I think I just get tired of working on it! So, I put it down and don't go back to it for a few months. So call it what you will...

Here are the three different squares/colors/stitches. It will be GREAT when I get it finished. I'm making it to keep in my living room to cover up with when it's chilly...

red =  garter stitch, oatmeal = moss stitch, grey =  seed stitch (I think!!)

And the Other Stuff...

Over the last couple years I've been fairly crafty...a little of this, a little of that. First up is the Etch-A-Sketch ornament I made for my Christmas tree :)

love it!!  :)
It's felt, with embroidery, and there is a green grosgrain ribbon hanger that is not visible in this pic. (I also do some embroidery every now and then. I can't remember if I'd mentioned that previously...)

...

My sister's BFF had a baby not so long ago, so I decided I'd make her a little Bunny Blanket Buddy :)  I also decorated the craft box that I gave her the bunny in so that she could use that in the nursery as well. She had a little girl...(she looks just like her dad by the way)

bunny blanket buddy

Isn't it the most precious thing?? I have to brag on myself a little bit because I had to tweak the pattern a bit (mostly because I didn't like the way it looked according to pattern)...and here's the box in which I presented the bunny:


...

For Christmas 2010, I made my sister a multi-giant-granny square afghan. (She was all pouty because the Christmas before, I made E and R--my two nieces--knit afghans haha!! just kidding sis...). I can't find the pictures of the girls' afghans, but here is one of the squares of my sister's. I LOVED the colors in this one...


...

One year for Christmas, right after I learned to knit, my sister made me this CUTE ornament for my Christmas tree...I love it. And I have really wanted to make some myself to give to people, but I just haven't made the time! Again--I'm a procrastinator like that...

knit tree ornament by my sister :)
...
Now, the rest of my post is dedicated to the "little bit of life" that I refer to in my blog description. First up is a pic of one of my favorite flowers--the gardenia. This is a picture of the gardenia bush that grows at the corner of my great-grandfather's old house that I rented up until a year and a half ago. It's actually on the corner of the garage, so everyday when I'd get home from work and get out my car, I'd be greeted with the wonderful scent of gardenias :)  LOVED it...
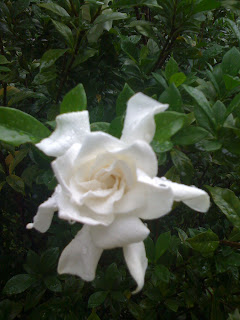
beautiful, yummy smelling gardenia
  ...

In February 2010, my first cat, my sweet Desi, died. She was almost eight. Shortly after that, I went to a workshop on Art Therapy and the Grief Process (I'm a counselor by day, remember). It was there that I picked up chalk! (and it may be then that all this crafty goodness started in earnest, too). 

The following three pictures are irises, done in chalk by me, and they hang above my bed. I'm very proud of them, as I actually consider myself to have NO artistic ability whatsoever. But every now and then, I'll get a spurt of it from somewhere, and this kind of stuff comes out...

irises in chalk
I also did a calla lily triptych, but those aren't framed, and I also cannot find the picture I took of them. Maybe one day I'll find it and post it here, because those are really lovely.

...

And this...this is my sweet, lovey-dovey kitty Jude. Around 6 months old, he loved getting into the trash can in the bathroom. Luckily, he would usually only get in if it was empty...He's now nearly 2 years old, and he is still lovey-dovey and the sweetest cat. And of course he has me wrapped around his little paw--I'm trained very well :)

my Jude

So there you have it--another sneak peek, a WIP, and some other stuff. Hope you enjoyed it!

I'd love to hear from you, so leave some comments!!